In the Moodle classroom you have the option to create more than one group at a time. In Moodle this action is called create groups automatically.
You can create groups based on:
- number of people each group should have – indicating the number of people per group would automatically calculate the number of groups to create according to the number of students in the classroom
- or based on the number of groups you want to create.
The names of these groups will have the scheme a common part of text and a letter or number that will differentiate one group from another:
-
Example 1: Practice group 1, Practice group 2, Practice group 3…
-
Example 2:Internship group A, Internship group B, Internship group C…
To create them,
- Go to Participants > settings dropdown menu (located in the upper right corner) > Groups.

- Click the Auto-create groups button.

- In Naming scheme , enter the common name that all the groups will have (in the example above, Practice group); or leave Group if you want to create the groups as Group 1, Group 2 or Group A, Group B.

-
- Choose @ to create groups with letters. Example: Group A, Group B
- Choose #to create groups with numbers. Example: Group 1, Group 2
CREATE GROUPS BASED ON THE NUMBER OF GROUPS
- In Auto created based on choose the Number of groups option and indicate how many groups you want to create.
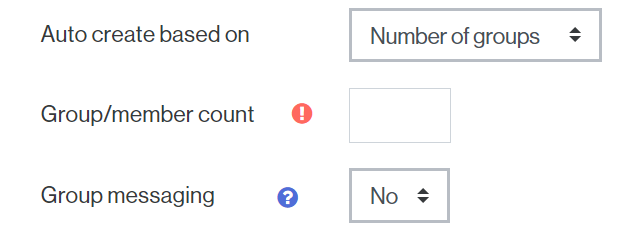
- If you enable the Group messaging option, people in the group will be able to send messages to each other.
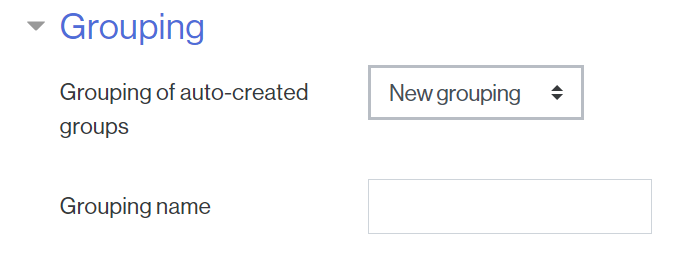
- In the section Grouping you must indicate the grouping to which the groups belong.
- If you have previously created it, select it.
- If not, create one in the Grouping section. Select New grouping and enter a name in Grouping name.
- Finally click the Submit button.

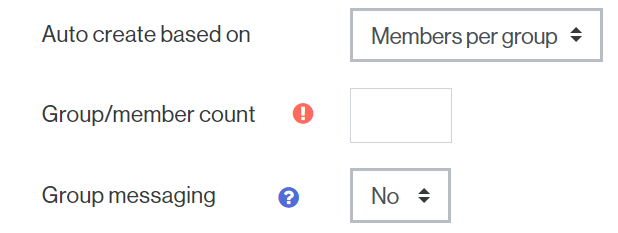
CREATE GROUPS BASED ON THE NUMBER OF MEMBERS
- In Auto create based on select the option Members per group and indicate how many people each group should have.
-
- If you enable the Group messaging option, people in the group can send messages to each other.
- In the section Grouping you must indicate the grouping to which the groups belong.
- If you have previously created it, select it.
- If not, create one in the Grouping section. Select New grouping and enter a name in Grouping name.
- Finally click the Submit button.