By default, when you change the classroom format to tile format, an icon will appear for each tile. You can change the icon or upload an image for each tile.
To customize the view of a section, you need to:
- Turn editing on.
- Look for the section to customize and click on the three dots to display the menu.
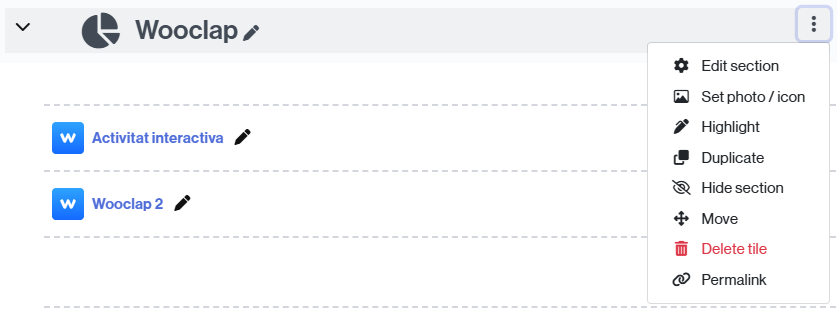
- Select the Set photo / icon option.
- Select an icon or one of the following options:
- Numbers.
- Photo library, to search an image previously uploaded.
- Upload a new photo, to add a picture from your device.
- Tile icons, to select an icon.
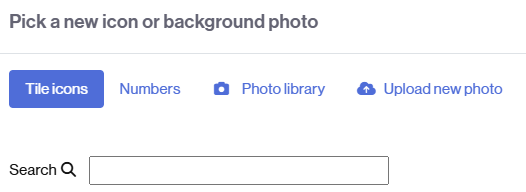
- If you wish to upload a new picture click the Upload a new photo option.
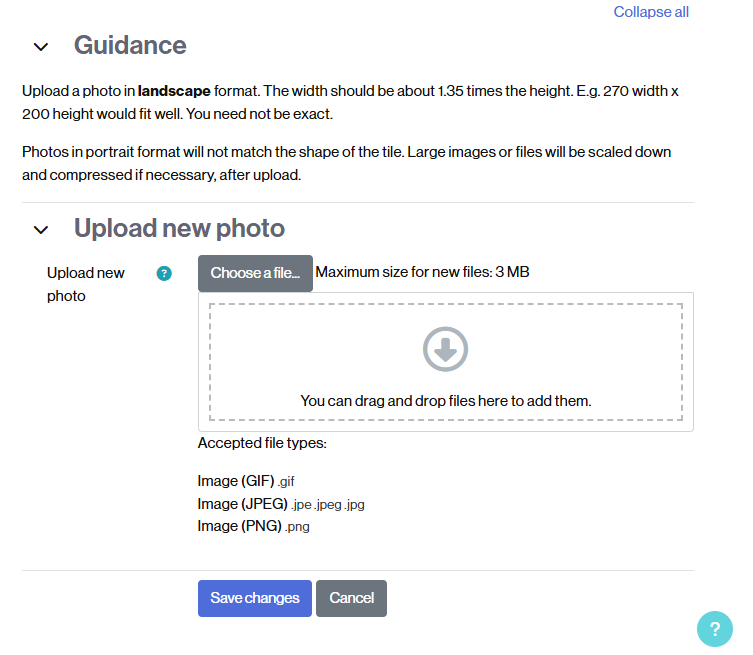
- To upload an image:
- either click the Choose a file option to browse for it in the classroom repository or upload it from your computer,
- or drag it from your computer to the upload area.
- To finish, click Save changes.

IMPORTANT. The same customization can be done by clicking on the icon (or image) that appears at the left side of the section title, once the editing has been turned on.