Moodle offers the option to easily record videos of up to 5 minutes in length, which will be automatically published in your classroom. You can record your image or capture your screen.
This resource can help you explain specific concepts, answer questions, provide brief information, quickly show how to perform a specific action, and more.
You can record and publish the video in any text field of any activity or resource, if it has a text editor.
For it:
- In the virtual classroom where you want to publish the video activate classroom editing.
- Click Activity or resource.

- Select the activity or resource where you want the video you’ll record to appear. Remember, it can be anything, including a Text & Media Area resource or a Page resource.
- If you want to view it directly in the classroom, the easiest option is to use a Text & Media Area resource.
- Create it and look for the video icon in the text editor. Click it.
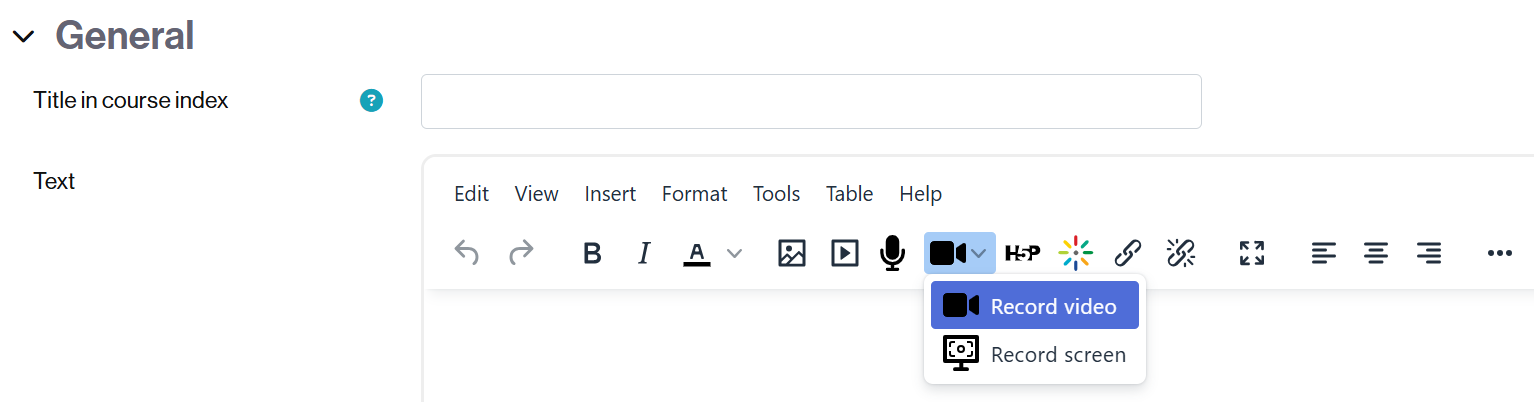
- A menu will appear with the following options:
- Record video (recording from the webcam)
- Record screen (only the screen will be recorded).
How to record a short video using a webcam
- Select the Record Video option.
- A window will open where you can capture the camera image. To start recording, click the Start recording button.

- The recording will start, and a clock will indicate the time remaining until the recording ends.
- To stop, click the Stop recording button.

- A window will appear where you can:
- View the video.
- Record it again (if necessary).
- Attach it in the text field if the video is correct.
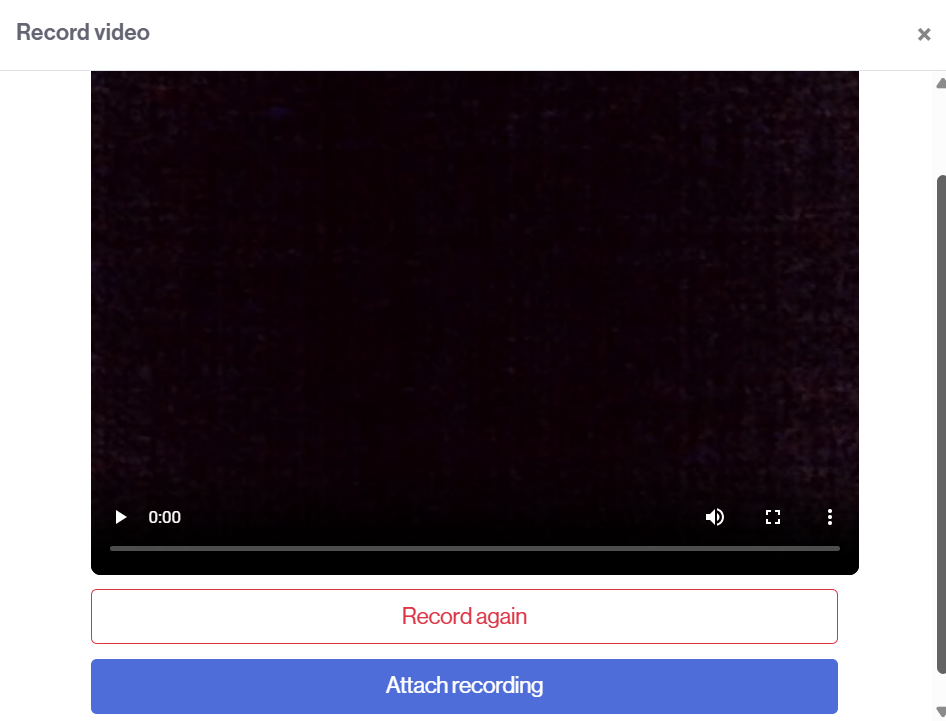
- If you accept the recording, click Attach recording.
- You will automatically see it in the text and multimedia area.
- Finally, save the changes to view them in the classroom.
How to record the screen
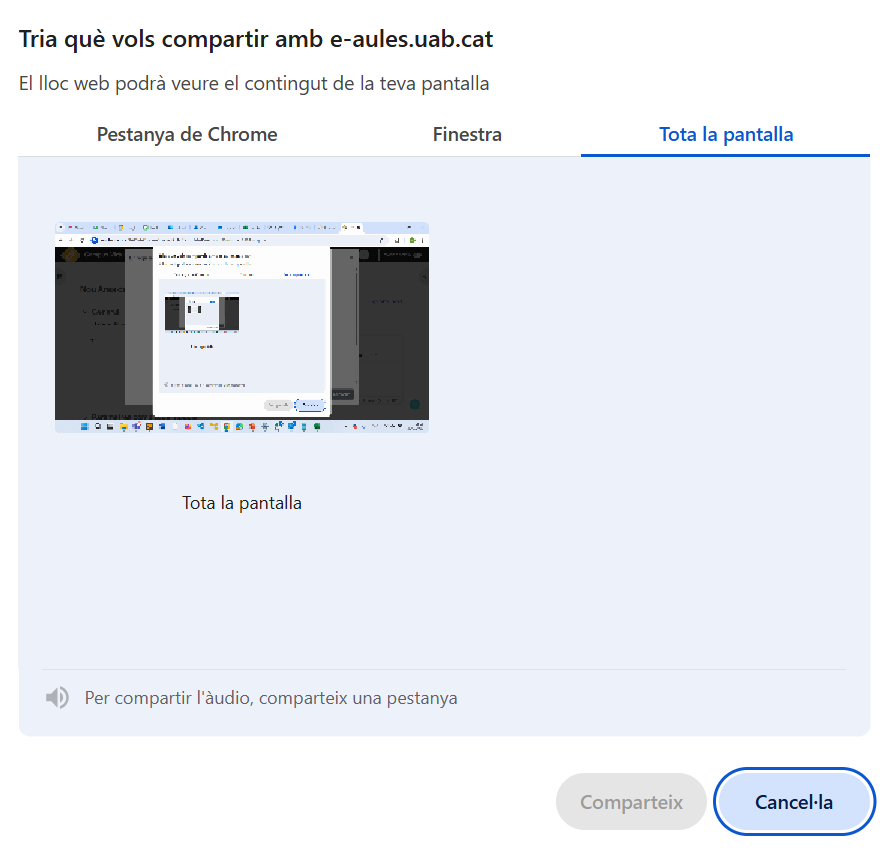
- Select the Record screen option.
- Select the screen window (or the entire screen) you want to record.
- Return to the tab where you have the classroom and where you created the resource (from where you selected the screen recording option).
- Click the Start recording button.

- Return to the tab or screen you want to record and perform the actions you want captured.
- When finished, return to the tab where you have the classroom.
- As in the previous case,
- you can stop the recording,
- view it,
- repeat it if necessary.
- To save the recording, click the Attach recording button.
- You will automatically see it in the text and multimedia area.
- Finally, save the changes to view them in the classroom.