The steps to follow are:
- CREATE EMPTY GROUPS IN THE CLASSROOM
- PREPARE THE FILE WITH THE INFORMATION OF THE GROUPS
- STUDENT ASSIGNMENT (UPLOADING THE FILE TO THE CLASSROOM)
1. CREATION OF EMPTY GROUPS AND THE GROUPING CONTAINING THEM
You will first need to create the number of (empty) groups you need:
- How to create an empty student group
- How to create more than one empty group at a time
- How to create a grouping
2. PREPARATION OF THE FILE WITH THE INFORMATION OF THE GROUPS
Prepare the file that will be used to carry out the massive load. this file must have the extension “.csv” separated by ;.
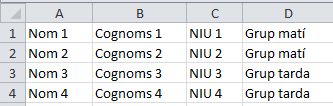
The file must have 4 fields, each of which will be a column:
- first field – NAME of the student,
- second field – SURNAME,
- third field – NIU and
- the forth, the NAME OF THE GROUP assigned (and that you have previously created empty in the classroom).
NOTE. The information in the first three columns can be obtained by accessing Sigma and downloading or exporting the student lists.
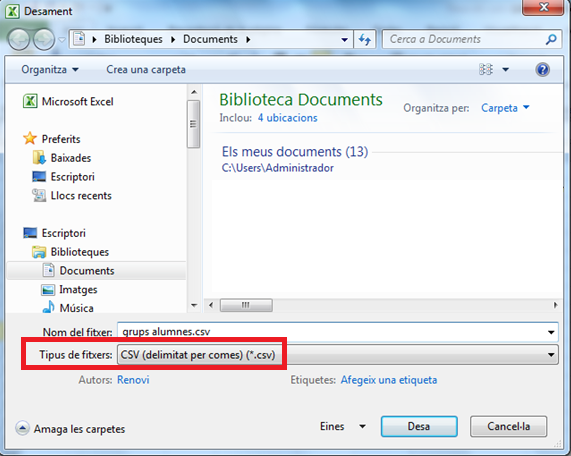
Finally, from excel, save the file as a document in CSV (delimited per comes) (*.csv) format.
3. ASSIGNMENT OF STUDENTS TO GROUPS (UPLOADING THE FILE TO THE CLASSROOM)
- In the classroom, turn editing on and click the + Add an activity or a resource button.

- Select the Group self-selection activity.

- Fill in only the required field: Name.
- In the General section look for Select groups from grouping to indicate the grouping to which the groups belong to.

- Save the changes.

IMPORTANT. Hide the activity, since it does not have to be seen by the students – it only has to be used to upload information to the classroom.
- Click on the name of the activity.

- Click on Seleccionar archivo (Choose a file), to select the .csv file that contains the student data. Once the file has been uploaded, click on Importa.

Each student will automatically be enrolled in the group that has been assigned to them.